Keeping our homes and families safe is pretty much a universal top priority. But who has time to sit by the door all day waiting and watching the door? That’s why smart doorbells like Ring have become so popular. With these, you can see who is at your door from anywhere using the app on your phone. You can even talk to visitors with crystal clear two-way audio! To install a Ring Doorbell takes a bit of handiwork, but it’s easier than you might think.
In just a moment, we will break down the process and walk through it step-by-step. From gathering materials to mounting and syncing your new Ring device. With the right preparation and these simple instructions, you’ll have your new smart security up and running in no time. From there, you can experience the convenience and peace of mind that millions of households already enjoy.
About Your Ring Doorbell
Ring revolutionized home security when it introduced its video doorbell system in 2013. This innovative product was one of the first DIY smart home devices to hit the mainstream market. Since then, Ring has continued improving its signature video doorbells while expanding its product line.
A Ring Doorbell is a security camera that replaces your existing wired doorbell. When someone presses the button or triggers the motion sensors, the device streams live video right to your smartphone or tablet. Key features that make Ring Doorbells so useful include:
- HD Video – See visitors up close in 1080p HD resolution day or night. Zoom in on important details.
- Two-Way Talk – Speak to guests or give instructions to delivery people through the doorbell’s built-in microphone and speaker.
- Customizable Motion Zones – Focus motion alerts only on the areas you want to monitor and reduce false alarms.
- Smart Alerts – Get instant notifications when your doorbell detects activity. Customize your motion settings.
- Remote Monitoring – Watch real-time video on demand and receive alerts anywhere through the Ring app.
- Power Options – Choose from wired or battery-powered models depending on your home’s setup.
- Expandability – Connect other Ring devices to create a full home security system.

Before You Start
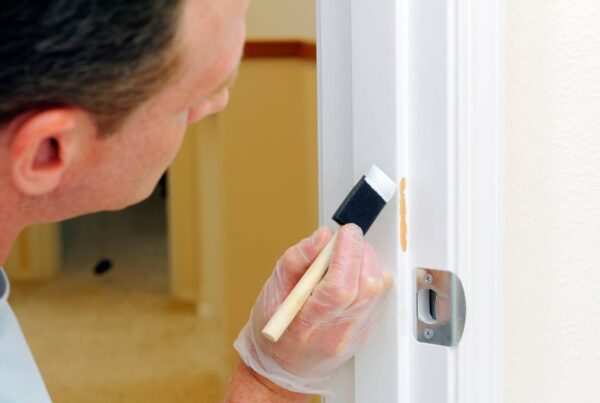
Installing a Ring Doorbell is a straightforward DIY project – if you come prepared. Consequently, proper planning and tools will make the process much smoother.
Firstly, check that your existing doorbell wiring is compatible. Most homes have 8-24 volt AC power doorbells, which will work with Ring Doorbells. If you don’t have an existing wired doorbell, you can opt for a battery-powered Ring model. You’ll also want to make sure your WiFi router is within range of where you’ll install the doorbell.
Then, gather these recommended tools and materials:
- Screwdriver with interchangeable heads
- Power drill with assorted drill bits
- Pencil and tape measure
- Wire strippers
- Voltmeter (to test wiring)
- Hammer
- Level
- Ladder (for high-mounted locations)
As a note, you will be working with electrical components. For safety, be sure to turn off the power to the doorbell at the breaker before starting. Review Ring’s safety precautions in the manual as well.
Step-by-Step Installation
Now that you’re set up for success, it’s time to install your Ring Doorbell! Follow these steps for smooth sailing:
Set Up the Ring App
- Download the Ring app on your iOS or Android phone or tablet. This allows you to manage your Ring Doorbell remotely.
- Create an account and log in to the app.
- Follow the in-app instructions to connect your Ring Doorbell to your WiFi network.
Turn Off the Power and Remove the Existing Doorbell
- Shut off power to your doorbell at the breaker box for safety.
- Use a screwdriver to detach and remove your current doorbell (if applicable).
- Examine the doorbell wires and use a voltmeter to confirm they are 8-24 volt AC power.
Mount the Base Plate
- Position the Ring’s base plate centered around 50 inches off the ground.
- Use the included screws or anchors to mount the base plate securely.
- For brick, stucco, or uneven siding, you may need to drill pilot holes.
Connect the Wiring
- Attach the doorbell wires to the screws on the bottom of the Ring doorbell base. Follow the color-coded wire labels.
- Secure the wires neatly with the integrated cable tabs for a tidy look.
Attach Your Ring Doorbell
- Align your Ring doorbell with the base plate and turn the screw to lock it into place.
- Ensure the doorbell is straight and firmly secured.
Restore Power and Finish Setup
- Turn the power back on at the breaker box.
- In the app, follow the prompts to connect and configure your newly mounted Ring Doorbell.

Recommended Maintenance
The Ring app makes maintenance for your doorbell a breeze. When you need to, you can open the app to check your doorbell’s live view, battery level, and connection status. The app alerts you if anything needs attention.
Additionally, it’s a good idea to manually test your Ring Doorbell once a month. Press the button to trigger a video call to your phone and ensure flawless two-way audio. Verify that motion detection is working as expected.
Over time, dust and dirt can accumulate on the camera lens and affect video quality. About twice a year, wipe down your Ring Doorbell with a soft damp cloth to keep the lens clean. Avoid using cleaners or chemicals.
Finally, another important maintenance task is keeping your Ring Doorbell firmware updated. Routine software updates add new features and security patches. The app will prompt you to install firmware updates when available, and accepting these updates helps your Ring Doorbell run its best.
When to Call a Professional
Overall, installing a Ring Doorbell yourself is a wise way to save money. However, there are a few scenarios where it pays to call in a professional. If your existing doorbell wiring is incompatible, an electrician can run new low-voltage wiring suited for Ring. They can also install a transformer to provide power if needed.
For troublesome wi-fi connectivity issues, a network technician can analyze signal strength and recommend router placement or range extenders. Also, if your home has ornate or challenging architecture, a professional installation guarantees proper placement and drilling. Experts have experience with tough set-ups.
Lastly, a certified Ring Pro can optimize motion settings, integrate other Ring devices, and provide full-home security consultation beyond basic doorbell installation. While the process is designed to be DIY, some homes benefit from a pro installation. For simple issues, Ring’s customer support can also provide troubleshooting assistance.
Conclusion
In summary, with so much to protect, it’s no wonder video doorbells have skyrocketed in popularity. Plus, it can be a worthwhile DIY project to install a Ring doorbell with the right guidance.
Following the steps in this guide, you now have the skills needed to securely mount a doorbell camera at your home’s entrance! While handy, these devices also require occasional maintenance like cleaning the lens and updating firmware. For guidance on maintenance or to schedule a home inspection while you’ve got safety in mind, reach out to Alpha Building Inspections in Merrimack, NH, and surrounding areas.