When it comes to home maintenance, certain tasks can easily be overshadowed by more immediate concerns. Regular lawn care or appliance check-ups often take precedence, while the humble water heater hums quietly in the background. Yet, to ensure its longevity and efficiency, you must not overlook regular maintenance. Among the critical components requiring your attention, the thermocouple stands out. This small but mighty part plays a pivotal role in your unit’s safety and functionality. Wondering how to clean the thermocouple on your water heater? It involves a meticulous process of shutting off the power and carefully handling the unit.
In this guide, we’ll demystify the thermocouple, offering you step-by-step instructions on how to clean it and when to consider enlisting professional help.
What Is A Thermocouple?
Nestled near the base of your gas water heater, the thermocouple is a safety device that measures temperature and regulates the gas flow. It ensures that your pilot light is active when it needs to be, preventing unburned gas from accumulating. In simple terms, it’s the gatekeeper that stands vigilant, keeping your water heating system efficient and your home safe.
The Role of a Thermocouple
The thermocouple works by generating a small electrical current when heated by the pilot light. This current signals the gas valve to stay open, allowing your water heater to function seamlessly. If the pilot light goes out, the thermocouple cools down, and the current stops, prompting the valve to close and halt the gas supply. This automatic shut-off is crucial to prevent gas leaks, which could lead to potential hazards.
Signs of a Dirty Thermocouple
Over time, thermocouples can accumulate dirt and corrosion, which may hinder their performance. If you notice that your water heater’s pilot light frequently goes out or the unit struggles to heat water, it could be a sign that the thermocouple is dirty and requires attention.

How To Clean The Thermocouple On Your Water Heater
Cleaning your thermocouple is a practical and possible DIY task that can restore its function and extend the life of your water heater. Here are the steps to ensure a safe and thorough cleaning:
- Safety First: Always begin by turning off the gas supply to your water heater. If it’s electric, switch off the circuit breaker to cut the power. Safety cannot be overstated when dealing with gas appliances.
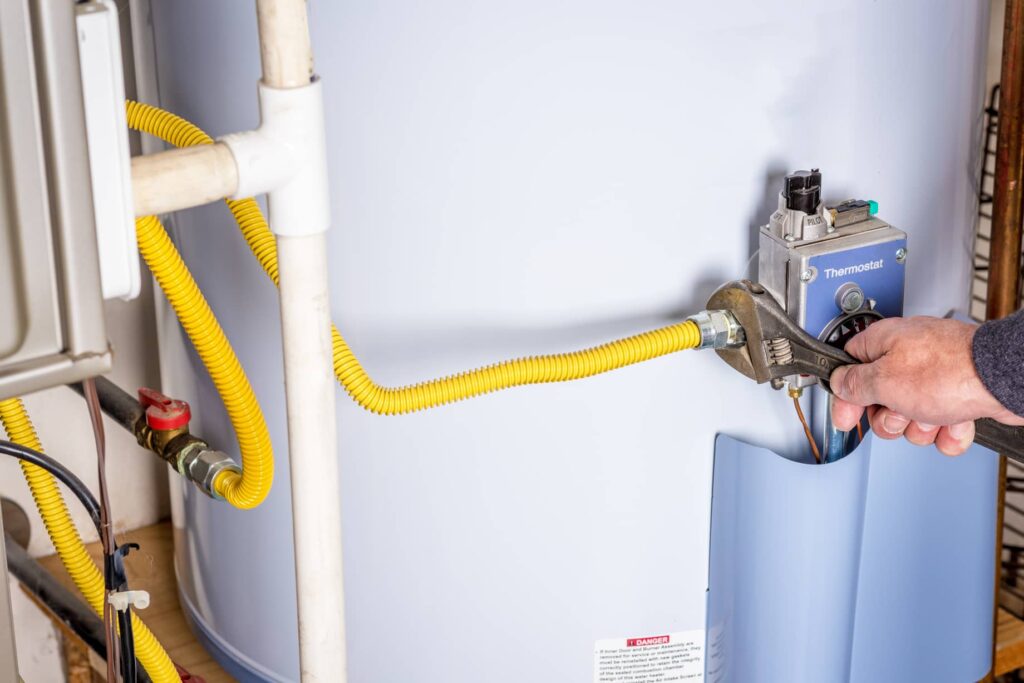
- Access the Burner Assembly: Before disassembling anything, take a photo of the setup for reference. Then, using a wrench, disconnect the burner assembly, which usually connects in three places: the thermocouple, the main supply tube, and the pilot supply tube. Once disconnected, carefully slide out the burner assembly.
- Cleaning the Thermocouple: Gently sand the ends of the thermocouple using fine-grit emery cloth sandpaper. This will remove any build-up without damaging the component. In some cases, removing the thermocouple entirely may not be necessary, but be sure it’s clean before reassembly.
- Reassemble and Test: Referring to the photo you took earlier, reassemble the burner unit, ensuring everything is reconnected correctly. Once everything is in place, turn the gas supply back on and relight the pilot light, following the manufacturer’s instructions.
By maintaining a clear, clean connection, your thermocouple will continue to accurately sense the pilot light’s flame, ensuring your water heater operates safely and effectively.
Other Recommended Maintenance
Maintaining your water heater extends beyond cleaning the thermocouple; it’s a multifaceted approach to ensure optimal performance and safety. Keep an eye on the anode rod, which guards against rust and should get a replacement when it becomes worn.
Annually drain and flush the tank to remove sediment that can hamper efficiency. Regularly test the pressure relief valve to prevent dangerous pressure build-up. You can do this by lifting the handle and listening for water discharge. Check around the unit for any signs of leaks or corrosion that could lead to more severe problems. Consider lowering the water heater’s temperature setting to around 120°F to save energy while still enjoying ample hot water.
Finally, although some maintenance can be done yourself, a professional inspection every few years can catch hidden issues and perform complex checks, ensuring your water heater’s longevity and safety.
When Do I Call A Professional?
If you encounter complex issues like a non-functioning pilot light after cleaning the thermocouple, persistent leaks, strange noises, or signs of serious corrosion, it’s time to seek professional help. Professionals have the expertise to handle gas and electrical components safely and tackle repairs that go beyond basic maintenance.
Additionally, if you’re uncomfortable performing any of the maintenance tasks or if your water heater is still under warranty, a licensed technician should be called to prevent voiding the warranty and to ensure the job is done correctly. Regular professional servicing can also preemptively address potential problems, saving you from more costly repairs down the line. When in doubt, the expertise of a qualified professional is your best resource to maintain the health and efficiency of your water heater.
Conclusion
All in all, knowing how to clean thermocouples and maintain various parts of your water heater for maintenance purposes is key. Stay proactive with your maintenance routine, but don’t hesitate to seek expert assistance when faced with persistent problems or tasks that feel out of your depth. A professional’s intervention can safeguard your home, maintain your water heater’s efficiency, and provide peace of mind.
To determine your water heater’s condition or for a comprehensive home inspection, reach out to Alpha Building Inspections in the Merrimack, New Hampshire area.